
I appreciate that I have really put the cart before the horse with this article. I really should have published this before I wrote my other articles on growing veg but this happens when you write articles that follow life rather than ones that are planned and executed like a professional magazine. So if I whetted your appetite for growing fruit and veg with my previous articles and you’re planning to designating a section of your garden to this endeavour, here are my tips on how best to go about it.
Nothing mentioned in this article has been sponsored. It’s all just my own personal opinion. If you like your sources to remain independent then please;
share this article, or
buy me a coffee on Ko-fi, or
make a one-time donation via Paypal
Locating your Veg Garden
Most people assume that a fruit and veg garden should be in full sun. It’s true that if you want to grow sweet fruit or tomatoes your plants will need a lot of sunshine but not all vegetables like full sun, like lettuce and broccoli, so don’t be afraid to have some of your veg beds partially shaded.
If possible locate your beds close to a rainwater butt as this will save you so much time, and back ache, lugging watering cans down the garden.
Type of Beds – Raised or Flat

Flat beds are simply just a marked-off section of bare soil that you plant into while raised beds are constructed to be higher than the surrounding ground level. Raised beds can be any height and if high enough can avoid you having to bend down entirely.
The proponent of the very productive no-dig method Charles Dowding uses flat beds very successfully in his garden but a lot of people favour raised beds because they often look neater and if they’re higher than 12″ deter carrot fly. Raised beds also warm up quicker than flat beds, particularly if built from a material that quickly absorbs heat from the sun like timber. On the downside raised beds are more expensive to construct, can’t easily be relocated, require a huge amount of topsoil to fill and the edging around the beds can be a great hideouts for slugs and woodlice.

Raised beds can be built from any solid material and there are pros and cons to all of the construction options. Timber is easier to build with and will help to heat up the soil quicker but will also rot more quickly. If you use timber to build your raised beds it can be tempting to use pressure treated timber as it will last longer but you may not want the chemicals used on this material leaching into the soil you grown your edible crops in.
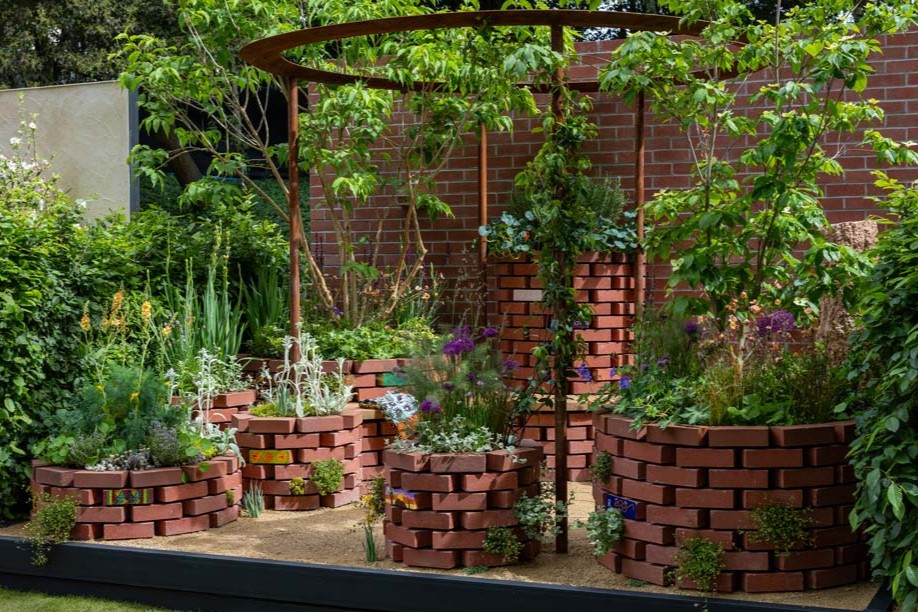
Brick or blocks are more permanent and typically require quite a bit of skill to construct properly. An easier way to construct brick planters is to use engineering bricks and some form of rod. Essentially you stick the rod in the ground and then thread the bricks over them to build walls. Here is an image of planters contructed like this in the Sighsavers Garden in Chelsea Flower Show in 2026.
If you don’t want to construct a raised bed from scratch you can buy proprietary systems online. Just buy the most durable you can afford as it’ll save you a lot of heartache in the long run.
I saw this great tip online on making plant beds from repurposed filing cabinets. They looked surprisingly chic and they’re generally very cheap to pick up.
Size of your fruit and veg beds
Regardless of whether you go for raised or flat beds I think it’s best to limit the width of the beds to no more than 1.2m or 4ft. This is for two reasons, firstly it’ll allow you to fit in at least two rows of plants and secondly, it allows you to weed the centre of the bed without having to stand on the bed. Standing on a veg bed is a big no, no. It compresses the soil making it harder for water, and therefore nutrients to penetrate down to roots.
Number of Fruit and Veg Beds
Although I’d advise you to draw up a layout for the maximum number of beds I’d advise starting small with just a couple of beds, and adding more as you go. No point putting in a load of work only to find out you hate growing fruit and veg.
Regardless of the number of beds you create you’ll have to plan for crop rotation. We need to rotate the location of our crops in order to avoid a build up of diseases and pests in the soil. The tried and tested rotation is to have potatoes followed by legumes, followed by brassicas, followed by onions, followed by roots. I find the following mnemonic a great way to remember this sequence; ‘People Love Bunches of Roses’.
I always advise people to only grow veg that they like and currently buy so if you don’t want to grow potatoes or onions you can just leave them out and plant legumes, brassicas and then roots. Any other vegetables not on this list can just be planted in spots that had roots last year.
If you’re planting fruit as well as veg remember that the fruit won’t like being relocated every year so plan for these guys to stay in the same spot.
And don’t forget that you can grow up as well as out; tomatoes or strawberries in hanging baskets, potatoes in tall planters, herbs on wall mounted containers.
If your ultimate goal is self-sufficiency here’s a guide on how much to plant to feed one person
And here some handy free software that helps you plan your garden and work out what needs to be done when throughout the year.
Making your beds
In the past when people wanted to create a new garden they would lift the turf (grass to you and I) off the soil and dig over the soil before planting anything but all of that has been turned on its head in recent years. The current thinking is that simply laying 6″ of compost directly on the grass and planting into that is all that’s required. In fact digging soil is now considered to be quite harmful to the soil structure and should be avoided if possible. Not convinced? Well check out the non-dig website for inspiration.
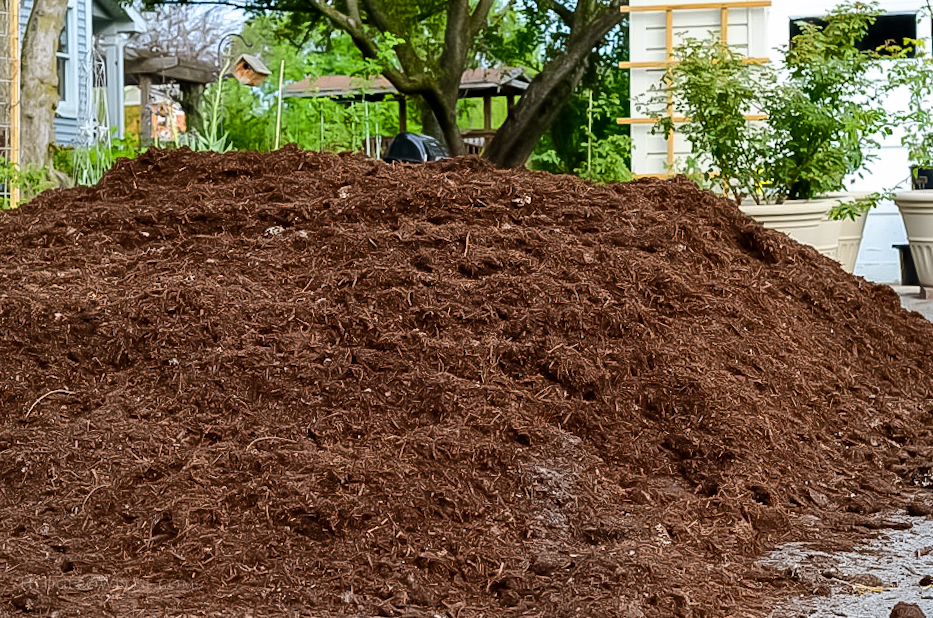
Whatever you do make sure you use top quality compost. None of that discount store crap or you’ll plants will fail to thrive. I didn’t invest in good compost when I created my own fruit and veg garden and I’m paying the price. My crops are okay but they’re nothing like they should be given the conditions they are provided with. I’ve decided that this spring I’m going to invest in a large deliver of compost and labour to help be transport it to the back garden and spread it.
You may be lucky enough to have enough homemade compost, if not the most obvious destination would be to a quality garden centre or nursery but all of their compost is going to be in single-use plastic bags, which we really don’t want. I have sourced compost in returnable bags from Landscape Depot in Dublin 24 but if you’re building a fruit and veg garden from scratch you’re probably going to need a lot more compost.After much research I’ve managed to source peat-free 100% organic compost made in Ireland, which I can get delivered loose, i.e. package-free. They’ve very helpfully given a list of stockists so you can find a supplier close to you.
Just a word of warning about types of compost. They all have their pros and cons. Rotted down horse manure is great for leafy veg but it’s rich in nitrogen and not potassium so your flowering fruit and veg may fail to thrive. Similarly mushroom compost is very alkaline and may need additional nutrients added to it to balance it out. It’s best to ask your supplier for a balanced compost to make your life easier, particularly in the first year.
Paths

Regardless of the type of beds you go with you’ll need have paths between them. You’ll be surprised at how little space you need between beds. Just the width of a wheel barrow is plenty, so approx 400 – 600mm.
If you’ve raised beds you’re going to automatically have a border for your paths if you’ve flat beds you can choose to do without and tolerate some spillage from path to bed and visa versa. If the idea of this drives you mad you could use a path edging to keep the whole thing tidier. These can be bought in metal or plastic, including recycled plastic, or made from wicker or willow. The metal ones are pricey but are idea for straight beds. I bought one made from recycled plastic before and it was a nightmare to get a straight line with it. I’d say it’d be fine for curved beds though. I also think the thinner metal edges would be easier to plunge into the ground than that thicker plastic ones that you have to dig a slot for.
Some people allow grass to grow on their paths, which they strimm every now and again to keep in check. Others put down a layer of cardboard or landscape fabric, which they cover with bark, straw or gravel. I chose to lay down landscape fabric covered by bark. I did this because I wasn’t sure if i was going to change my garden and bark was the cheapest covering at the time. If i did it again I’d dispense with the landscape fabric. It doesn’t do much and it just adds more plastic to the garden. The bark is fine but it rots over time and we frequently get mushrooms popping up on it in the Autumn. I also need to weed it as seeds settle in it over time. When I’m settled on the layout of my garden I think I’ll compost all the bark and invest in gravel.

If you do decide to use bark consider asking a local tree surgeon for waste chippings for free. We did this, and it saved us a fortune and helped us to avoid lots of plastic bags. Plus it’s more sustainable as the tree was local so the bark didn’t have to travel far. The bark chippings will be lighter in colour than the ones that you get in the garden centre but that’s only because it hasn’t been dyed, which in my opinion is a much better option. Plus natural bark chippings do mellow out in colour in a few weeks. Here’s a very helpful article on how to create bark garden paths from Lovely Greens.
Maintaining your fruit and veg beds
I’m assured by the no-dig website that not digging results in far fewer weeds, which is yet another attraction to this method of garden creation.
The nutrients in all soil being used to grow fruit or veg will get depleted over time so you’ll need to top it up with some good quality organic compost, like the one linked to above, every year. Most people do this in spring before this years seedlings go in but it really doesn’t matter when you do it as long as you do it once a year. Other than that you shouldn’t really have much else to do to keep your fruit and veg beds in top shape.
I think this article on 15 Mistakes that Beginner Gardeners Make is a great source of information too, as does this yearly garden plan.
E
PS – This time in previous years I’ve shared an Easy Recipe for Homemade Crackers and a 3 Ingredient Homemade Body Moisturiser
You might also be interested in my own other articles on Growing Fruit and Veg

Helpful tips for designing productive gardens. Thoughtful layout maximizes space and yields while making maintenance more manageable. Great advice!
LikeLike