You’ll know your seedlings are ready to plant out once they’ve developed a few ‘true leaves’, i.e. recognisable leaves of the plant, and a firm stem, but it’s important to wait until the soil is warm enough too, which according to Monty Don of Gardeners’ World is when it doesn’t feel cold to the touch. Most people look at day temps when deciding on when to plant out but actually night time temps are more crucial to seedling success. Read on for more tips.
Nothing mentioned in this article has been sponsored. It’s all just my own personal opinion. If you like your sources to remain independent then please;
share this article, or
buy me a coffee on Ko-fi, or
make a one-time donation via Paypal
Growing fruit & veg outside
What is ‘hardening off’?
Hardening-off is the process of acclimatising plants, grown indoors, to external temperatures. You start by putting them out in a sheltered spot (with little or no wind) on mild days out of direct sunshine, remembering to take them in at night. As the nights warm up you can start to leave them out over-night and once the seedlings have spent at least 3 nights outside and no cold-snaps are forecasted, you can plant them out into the soil.
How to plant seedlings
Most seedlings can just be popped into the ground so that the top of the root ball is just under the level of the soil but some plants like brassicas and sweetcorn need some extra TLC. Brassica seedlings need to be planted deeply to prevent their long stalks from blowing around in the wind and getting damaged, while sweetcorn needs to be planted in blocks to help with wind pollination. It’d take too long for me to go into all of the various vegetables here so I suggest you find out if the veg you’re growing need special treatment in this guide on growing vegetables in Ireland from the Green Vegetable Seeds.
Whatever you are planting remember to make sure the seedling is firmly planted, being careful not to damage the stem, and well watered in. I would then watch it regularly in the first week to make sure it doesn’t dry out and then just water once a week after that if it doesn’t rain.
For protection from frost etc you can cloche your newly planted babies with some plastic sheeting or fleece. In my experience plants under cloches need watering more frequently, which you can only do by removing the covering, which is a pain. Easier is to avoid planting out until the risk of frost has past, and to help here’s a guide to the last frost dates in Ireland.
Planting Seeds Directly
Not all seeds need to be started under cover. Some seeds can be planted directly into the ground as soon as the weather is warm and dry enough. This is particularly useful if you don’t have a green house or space to start seedlings indoors. Here’s a link to a handy seed planting calculator that’s best on the date of the last frost in your area.
If you’re planting seeds directly in the soil remember to stagger the planting of these so that you don’t end up with a glut of vegetables all ready at the same time.
As with seedlings you can cover directly-sown needs with a cloche (see below) to speed up germination and growth.
Where to Plant your Seedlings and Seeds
Match plants to the right light levels
Locate plants to get the amount of sun that best suits their needs. We assume that all plants want full sun all the time but this can cause salad leads to go to seed (bolt) very quickly and it can stress some plants leading to wilt or mildew. Here is a handy infographic on the light levels required by different plants. If your plot is in full sun you might use sun-loving plants in front and use their shadow to shield lower-light-loving plants.
Rotate your crops
Once you’ve settled on the right spot for your plants have a think about where they’ll move to next year. You need to rotate the location of your crops in order to avoid a build up of diseases and pests in the soil. The tried and tested rotation is to have root vegetables follow onions, which follow brassicas, which follow legumes, which follow potatoes. I find the following mnemonic a great way to remember this sequence; ‘People Love Bunches of Roses’
People – Potatoes are great at breaking up the soil.
Love – Legumes and fruiting vegetables such as peas, beans, tomatoes, cucumbers fix nitrogen into the soil
Bunches – Brassicas such as broccoli, cabbages, Brussel sprouts. These are hungry plants and will love the nitrogen left in the soil for them by the legumes.
Of – Onions, Garlic. You can leave this one out if you don’t have the space.
Roses – Root vegetables such as carrots, parsnips, leeks, onions etc. These guys don’t need much nitrogen so will do okay in soil that had brassicas in it previously.
If you don’t want to grow potatoes or onions you can just leave them out and plant legumes, brassicas and then roots. Any other vegetables not on this list can just be planted in spots that had roots last year.
Use companion planting
Some plants do very well when planted with complimentary species; called companion planting. For example Native American’s would plant squash, corn and beans together. The corn would shade the moisture loving squash and provide support for the beans to climb and after the corn and beans were harvested the squash would enjoy the extra space and ripen in jig time. Similarly some say that planting onions or garlic close to carrots masks the smell of the carrots thereby helping to camouflage them from the carrot rootfly. The website Tipsplants.com have a very useful infographic on companion planting that you may find useful. The same information in a very easy to read companion planting graph is available from One Creative Mommy.
How best to support young seedlings
Most seedlings don’t need supporting when first planted, it tends to be something that you can address as they grow. However vegetables that you want to train up a structure like peas, beans, cucumber or squashes are best planted at the base of a support structure from the get go.
Climbing plants can be left to trail on the ground if you prefer, this is less work initially but there are downsides
- the fruit may not get exposed to enough sun,
- it takes up much more space than growing them vertically,
- if we’ve a very wet summer the fruits can rot on the plant, and
- the slugs have easier access to the the plants

The type of structure you need for climbing plants depends on the number of plants and the weight of final fruit. The simplest structure for something like peas and beans is to tie 3 or 4 (or more) bamboo or willow sticks in a tepee structure. You then plant your seedlings at the base of each stick, on the inside, and tie them onto the canes as they grow or wrap the structure with some twine so that the plants can wrap their tendrils around.

You could make a more elaborate support structure from bamboo canes or opt for something sturdy like this one shown in the photo or a metal ready-made pea and bean support frame from Quickcrop.ie.
Sometimes people use netting on supports like this, which plants can grow up themselves. This support netting typically comes in plastic, metal or jute. Although not reusable I think jute is the better option because at the end of the season it can be impossible to separate the plant material from the support netting so compost the whole lot together, which you can do with the jute version, might be the easiest option.
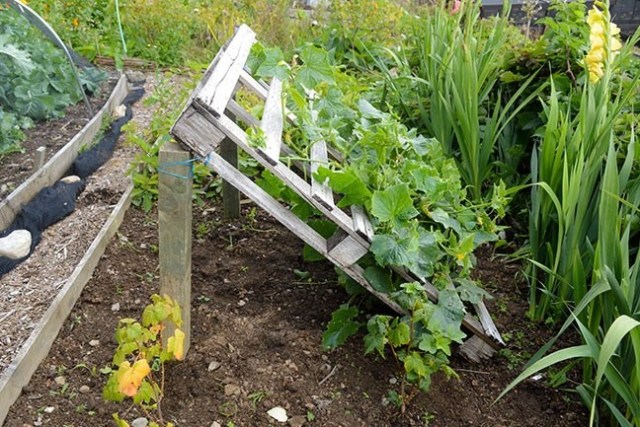
Lovely Greens has an excellent tutorial on how to build a support for cucumbers with a pallet.
Protecting seedlings from munchers
When we’re planting seeds or seedlings we have 2 challenges to manage; weather and wildlife munchers.
Wildlife munchers varies garden to garden, in mine it’s birds (particularly pigeons), squirrels, butterflies and slugs. You may not have much of an issue with uninvited munchers so don’t be alarmed by the following information on cloches and fruit / veg cages. You may not need them at all.
I didn’t have much of an issue with munchers in my first garden but my second one is a totally different story. I’d suggest doing nothing for the first year, see what you need and then plan over the winter for the following one.
Cloches and cages can be great if you need them but they are a hassle, and sometimes expensive, to construct and can make weeding or harvesting your fruit and veg quite a palava.
Keeping slugs at bay
Plants are at their most vulnerable when they’re young and the growth is soft. Once plants get established they may get nibbled by slugs but typically they can stand it. It’s really only in the early days that you need to be very vigilant.
In my quest for natural slug deterrents I’ve trialled crushed egg shells, copper tape barriers, rings of coffee grounds, wool pellets, and sharp sand around plants but none of these have managed to keep these little beasties away. I’ve also tried organic bird-safe slug pellets but as with most slug pellets didn’t see much benefit. To date the only thing that has worked for us to date is Nemaslug, particularly when it’s applied early on in the season. If you’re rather be self-sufficient, and have the stomach for it, you can farm your own anti-slug nematodes.
I’ve been told that the ultimate treatment for slugs and snails is a hedgehog or a frog. I’m now happy to report that, after constructing a log pile, we do have a frog in our garden, although I’m not seeing much reduction in our slug population.
Managing crop damage from Pigeons & Birds
Cruciferous vegetables (broccoli, cauliflower and cabbage) are particularly attractive to the hoards of pigeons that frequent my estate. I’ve tried hanging old CDs around as bird scares but with no joy. The only thing that works for us is netting. If we don’t net our broccoli plants pigeons will have them stripped bare in 24 hours. The same goes for our fruits bushes, which are constantly raided by squirrels and birds in my garden.
Deterring Butterfly Babies
Of course it’s not butterflies that actually damage the plants, it’s their little babies, who can munch their way through your precious plants in jig time. A friend told me that the cabbage white butterfly is territorial and will run a mile if you position a fake white butterfly, made from a milk bottle, near the susceptible plants. I haven’t test this myself but it’s work a shot. Otherwise butterfly proof netting over all your plants is the only way.
Protecting seedlings from the weather
Weather is the other threat to our fledging plants. If it’s too cold the poor little seeds or seedlings won’t grow and they’ll wither and die. Similarly if it’s too wet, they’ll just be drowned and probably rot off. It’s hard to do much about the weather other than water your seedlings when it’s very dry or windy – wind dries out plants just as much as sun – and support them so they don’t get bashed around by the wind.
The best cloches or cages to protect your plants
Although both forms of protection, cloches and cages do different jobs. Cloches protect from both weather and munchers, while cages only offer protection from winged munchers.
Cloches can either be for individual plants or for a row of plants and can vary in height to suit the plants you’re protecting. The are formed with curved supports and some form of covering, rigid or flexible.
Cages on the other hand tend to be more elaborate affairs; large structures that you can walk into. However in this article the term ‘cage’ refers to rectangular structures that use uprights and netting.

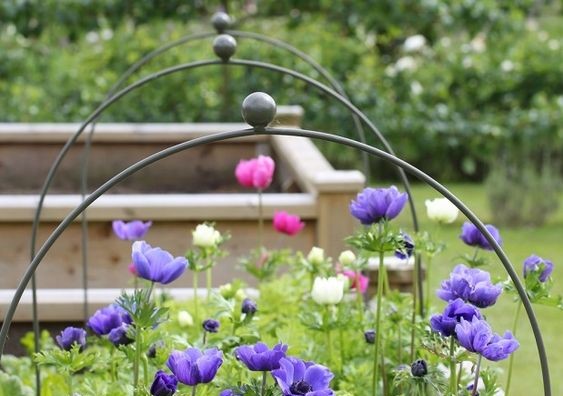
Cloches – Individual cloches range from beautiful glass bell cloches (see above) to glass lanterns to a simple milk carton with the bottom cut off it.

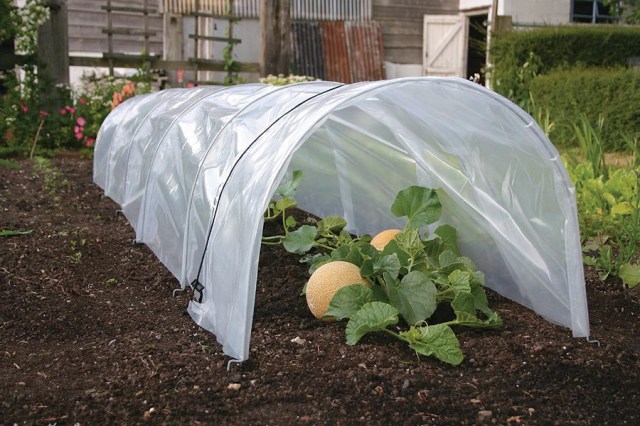
Most fruit and veg gardeners cloche a row of plants, which can be done with a rigid cloche, made from solid sheeting and supports. Rigid cloches can be homemade, see image above, or bought ready made as a complete system.

Cloches can also be flexible, made with hoops with a net or fabric covering (see above) or bought as a complete system, like those from Easy Tunnel (see below).
If you really want to splash out and have a garden that’s as pretty as it is productive check out the stunning metal cloche hoops from Agriframes shown at the top of this article (see top photo)

or these rustic cloche hoops from Plant Belle Shop in the UK. Just be aware that, although pretty, uncoated metal frames in the garden will rust and this rust can stain hands, clothes and fleece.
or these modern rectangular aluminium cloche hoops from Gardening Naturally
We have two Easy Tunnels ourselves and they work very well, but we find them a bit narrow at 450mm wide. We also tried these 860mm wide bamboo cloche hoops but found that they lost their tight curve after a year, making them tricker to use.
What covering to put over your cloche hoops
Of course you’ll need to cover your cloche supports with some sort of covering and I go through the options at the bottom of this article.
Options for fruit and veg cages
You can buy lots of proprietary cage support structures online, made from timber or metal or bamboo, but if you’re starting out you might want to keep costs low and construct one yourself.

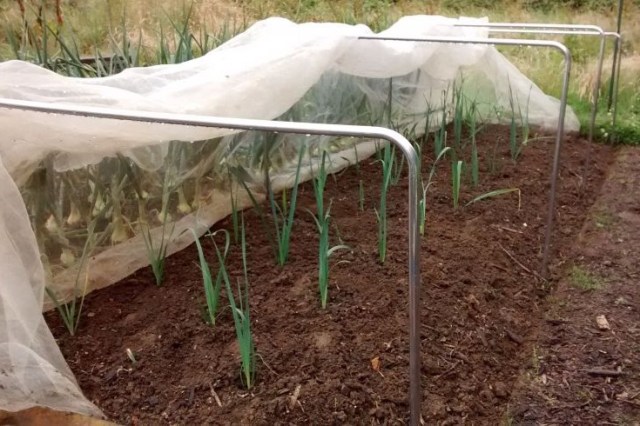
DIY cages are composed of two parts, the support and the covering. The support can be as simple as posts topped with upturned terracotta pots that you drape the covering across and pinned to the soil or weigh down with bricks or stones along the edge.

Another option is to make a frame from bamboo canes. We’ve tried this in the past but we found it impossible to tie the canes together to create a strong enough support. I managed to pick up these cane connectors on my travels and gave them a try this year. They worked to a point. It was hard to find canes with just the right size to fit into the holes and when I did the overall structure wasn’t very sturdy. I suggest these are okay for small cages but not large ones. Another cane connector I came across, which can be used with aluminium bars is called a Buildaball. Maybe this would result in a more robust cage.

Here’s a big daddy of fruit cages, made using a DIY kit from Hubs in the UK. Stunning, isn’t it?
Picking the right covering for cloches and cages
Whether you’re using cloches or cages you’ll need something to cover it and different forms of sheeting serve different functions;
- netting to protects from winged munchers,
- fleece to protect from the cold and winged muchers, like the carrot root fly which is active in Ireland up to June,
- plastic sheeting (rigid or soft) to protect from the weather and create an micro-climate inside the cloche, speeding up germination and growth.
Choosing Netting
When it comes to this covering the most important thing about netting is the size of the holes. A net with large holes may stop birds but it’ll be useless for butterflies so go for 10mm x 10mm or lower if this is what you need to deter. I’ve used butterfly netting that’s 5mm x 7mm, to successfully protect my broccoli.
There is a form of netting with holes so small it looks more like fleece. Called enviromesh, this form of sheeting protects plants from sun, insects and heavy rain while letting moisture and air to pass through.
If growing plants that are insect pollinated be careful not to get netting that is too fine as it may keep out the creatures you need to get fruit.
Most of the netting on the Irish market is hard and not very flexible. This is fine for simple structures, over hoops to make a cloche, but it’ll drive you crazy if you’re trying to pull it over square or rectangular frames. For this reason I’d recommend a woven mesh netting like this one from Fruithill Farm in Cork. If you want less than the 4m x 10m size that Fruithill farm sell you can order it by the length from Gardening Naturally in England.
Whatever type you go for make sure your netting pulled taut. Loose netting is a real hazard to birds as they can get tangled up in it if they land on it.
And just before I go I thought this was a really cute idea for DIY plant labels.

I think that’s enough for now. Time to get out into the garden!
Other Grown Your Own Articles
Check out the other articles in this series
- Growing Fruit & Veg: Design and Layout
- Growing Fruit & Veg: Raising seedlings,
- Growing Fruit & Veg: Feeding and Watering,
- Wildlife Friendly Gardening
- Sustainable Gardening Hacks
- Guide to Composters and Composting
E

I don’t have room for seed-starting, so I buy seedlings from Quickcrop – I thought they were delivering end of April but they’re delivering today. Eek. TOO COLD AND WET. I have individual cloches and got lots of warm weather crops last year (little tomatoes, basil) but haven’t found a good solution for a rental to mimic a glass-house.
LikeLike
My seedlings germinated inside this year but they’re still very weak, so I’m going to put the next batch in seed trays under a cloche in the garden
LikeLike
Good advice! Happy to see that you pointed out the importance of nitrogen (growing legumes) and how the Native Americans grew their three sisters. We know how to plant crops that can grow in synergy with each other and harmony with the planet. It’s important to support farmers who practice these techniques (when we can’t grow our own crops).
LikeLike
Absolutely. Just heard this week that organic farmers in Ireland can get a derogation to use some chemicals if they can prove they need to for commercial reasons, which is surprising.
LikeLike